
Last updated: June 25, 2026 · Reading time: 2–3 minutes
Installing Icinga Director on Ubuntu 26.04 is faster than you might think, as long as you know where the pitfalls are. This guide walks you through the installation, database setup, and initial configuration step by step, until you can roll out your own hosts and services using the Director.
The Most Important Points at a Glance
- You need a running Icinga 2 instance with the API feature enabled as a basis
- The Director gets its own MySQL/MariaDB database; the character set must be
utf8mb4, notutf8. - After completing the Kickstart Wizard, you can immediately create and deploy hosts, services, and templates via the web UI.
In this guide, I’ll show you step by step how to install Icinga Director on your Ubuntu 26.04, set up the database, and create the resource in Icinga Web. Ultimately, you’ll be able to roll out changes directly through Director and manage your monitoring environment centrally.
Haven’t installed Icinga 2 yet? Then get started with our guide on setting up Icinga 2 on Ubuntu 26.04.
Step 1: Install Icinga Director
To install Icinga Director, use the following command:
apt install icinga-directorStep 2: Create the Icinga Director database
Icinga Director requires its own database to store its configuration data. Set them up as follows:
mysql -u root -p

CREATE DATABASE director CHARACTER SET 'utf8';
CREATE USER 'director'@'localhost' IDENTIFIED BY 'DeinSicheresPAsswort';
GRANT ALL ON director.* TO director@localhost;Would you rather have it installed?
Our consultants will set up Icinga Director for you in a production environment, including high-availability (HA) configuration, a backup strategy, and monitoring onboarding.
Free Initial Consultation →
Step 3: Create a new Icinga database resource
In Icinga Web, click the gear icon in the lower-left corner to access the application settings. From there, switch from the “General” tab to the “Resources” taband click “Create New Resource. “
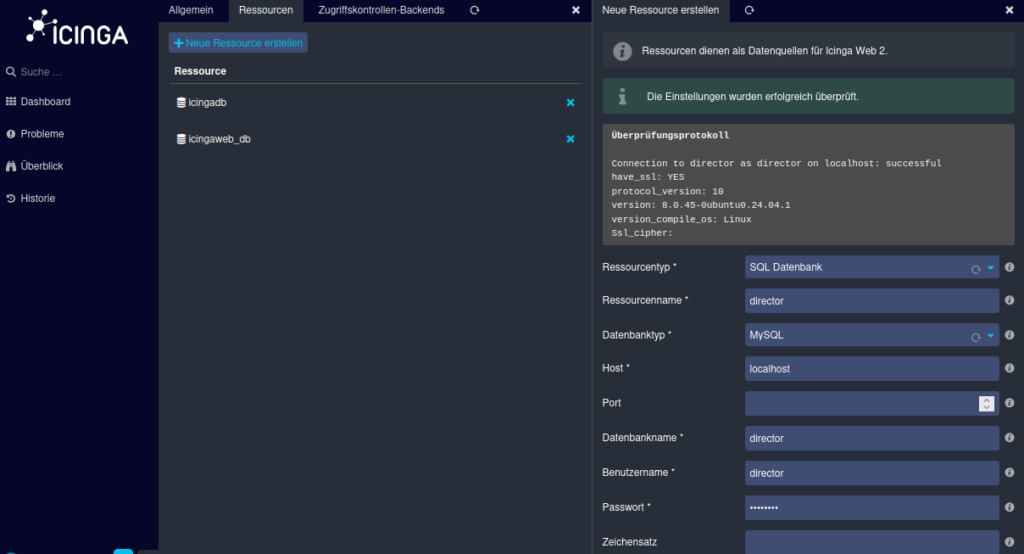
Enter the login credentials you set up in Step 2.
Step 4: Configure Icinga Director
Click “Icinga Director” in the left-hand navigation bar. The first time you run the program, the Kickstart Wizard starts automatically and establishes the connection between the Director and the Icinga 2 instance.
The following information is required for this:
- Endpoint Name: You can find the name in etc/icinga2/zones.conf, or you may have noted it down when running the Icinga Node Wizard.
- API username and password: You can find both of these in /etc/icinga2/conf.d/api-user.conf.
If the page does not display correctly after saving, simply reload it by pressing Ctrl + R.
Step 5: Roll out the configuration
After setup, the Director displays the number of pending changes in the left-hand navigation bar. To enable this, go to “Deployments” in the menu bar, click “Create Configuration, “ and then click “Deploy. “

Icinga Director is now fully configured and ready for use.
